2026-07-26 · Updated 2026-07-28
Which Background Remover Is Most Accurate? Free Tools Compared
Why no background remover is "most accurate", what really decides edge quality, and a five-minute test to rank the free tools on your own photos.
Last updated: July 28, 2026
Background removal sounds simple — upload an image, get a transparent PNG. In practice the difference between tools shows up on the hard parts: hair, fur, translucent objects, and edges against a similar-colored background. This guide explains what actually determines that edge quality, gives you a five-minute test to rank tools on your own photos, and compares the free options on features you can verify from their current pages. It does not claim a controlled accuracy benchmark across every service — that result would not transfer to your source images anyway.
Quick answer: which background remover should you use?
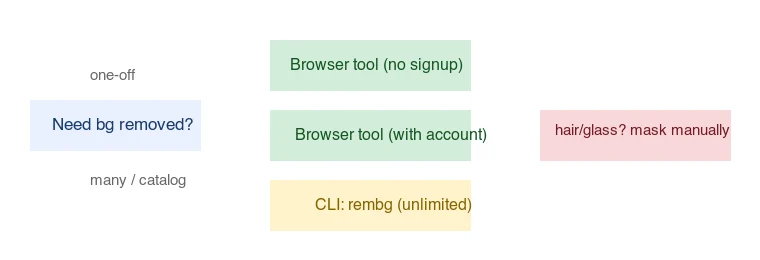
Pick a no-signup online tool for a few ordinary photos, a local CLI tool for confidential or high-volume work, and manual masking for fine hair or glass. No single remover wins every image type, and feature documentation cannot establish which model produces the cleanest edge on your own source photo.
Match the tool to how often you remove backgrounds and how many images you have:
| Situation | Use | Why |
|---|---|---|
| A few product photos, no signup | Imagic AI Background Remover | No account or watermark; server processing with PNG output |
| Occasional, wants visual cleanup | remove.bg | Polished workflow; check its current free-resolution limits |
| Recurring, many images | A CLI tool (rembg) |
Scriptable, unlimited, no per-image cap |
| Pixel-perfect control | Photoshop/GIMP manual masking | Best edges, but slow per image |
If you only do this occasionally, any browser tool works. If you process a catalog, a CLI tool removes the per-image cap. For the underlying technology (U2-Net and how it segments subjects), see the AI background removal guide.
What is the most accurate background remover?
There is no single most accurate tool, and the reason is structural: accuracy is set by the model weights and your source image's edge difficulty, not by the brand on the upload page. Most free removers are wrappers around the same small set of open segmentation models, so two "different" tools frequently return near-identical cutouts.
Concretely, this site's own remover runs the isnet-general-use model through rembg — a 170 MB ONNX file, and a newer successor to the U2-Net weights most free tools still ship. Any other tool running those same weights produces the same edge decisions on the same photo. Where tools genuinely diverge is where they don't share a model: remove.bg does not publish its model, and proprietary services trained on larger hair-and-fur datasets tend to hold semi-transparent strands better than stock U2-Net. The newer open models (IS-Net, BiRefNet) narrow that gap, but as the comparison below shows, they do not close it.
So the honest ranking is by image type, not by tool:
| Source image | What decides accuracy | Realistic expectation |
|---|---|---|
| Solid subject, plain background | Nothing much — all models work | Near-perfect from any tool |
| Product with hard edges on white | Mask tightness at corners | Clean; check for 1px fringe |
| Portrait with flyaway hair | Model's alpha handling | Best tool still leaves strands to fix |
| Glass, smoke, sheer fabric | Whether the model outputs fractional alpha | All models over-remove; expect manual work |
| Subject color ≈ background color | Contrast, not model quality | Gaps are likely regardless of tool |
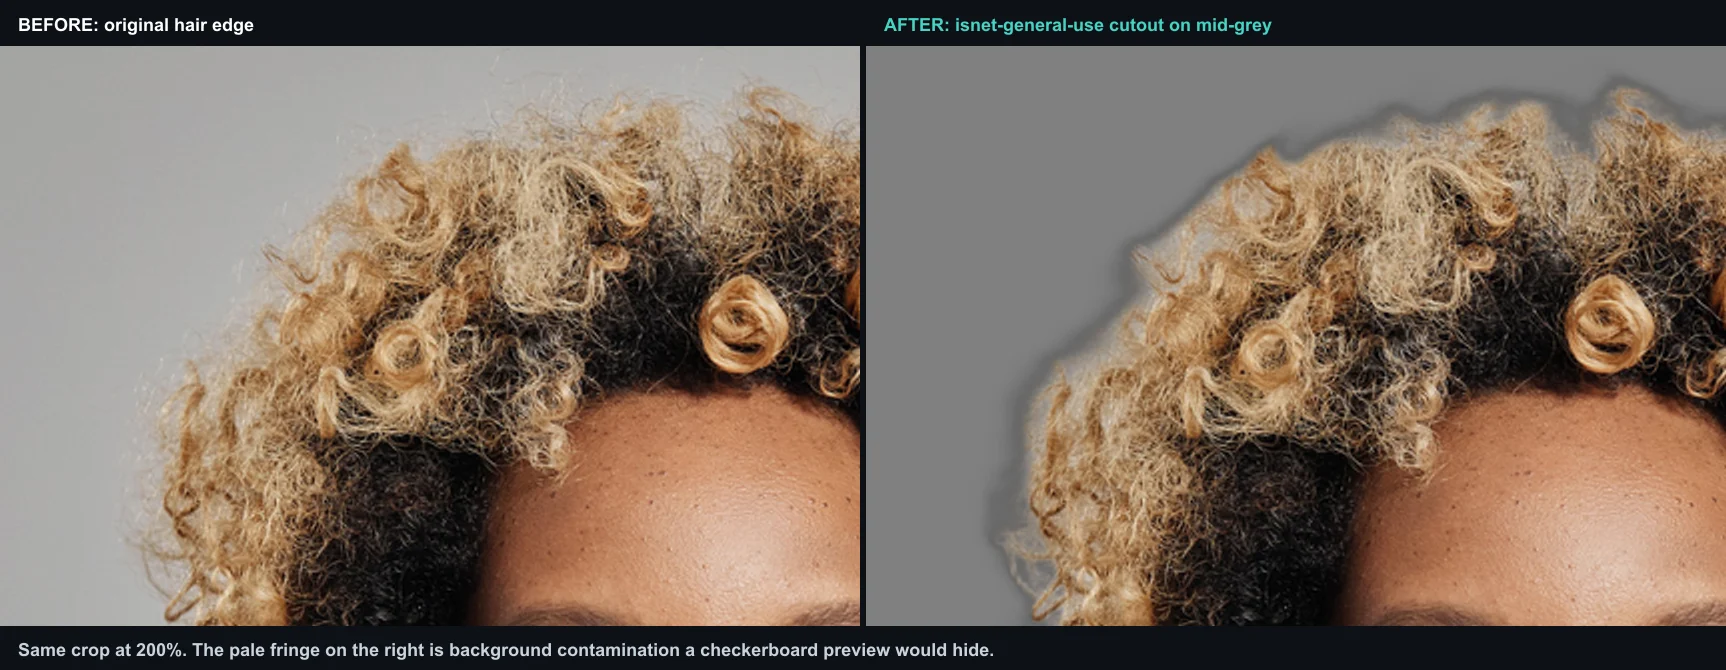
The cutout above is this site's own isnet-general-use output on a curly-hair portrait, composited on mid-grey. The pale fringe around the curls is background contamination — the model kept edge pixels whose colour came from the light backdrop. It is the single most common defect, it survives a current-generation model, and it is invisible on a checkerboard preview.
How do you test accuracy yourself in five minutes?
Feature tables cannot answer this for your catalog. Run the same three photos through any two candidates and compare:
- Pick one easy (solid subject, plain background), one medium (product with a defined edge), and one hard (hair, fur, or glass) image from your actual source set.
- Run all three through each tool at full resolution.
- Open each cutout over a mid-grey background, not the checkerboard — a checkerboard hides both white fringing and dark contamination.
- Zoom to 200% on the hardest edge and score three things: halo, gaps, and whether soft edges stayed soft.
- Reject any tool that fails the hard image. The easy one tells you nothing; every tool passes it.
The tool that wins step 5 on your own photos is your most accurate remover. That result will not transfer to someone shooting a different subject on a different backdrop.
What actually differs between tools?
Free background removers use segmentation or matting models, but providers rarely expose enough implementation detail for a model-by-model accuracy claim. The differences you can verify before uploading are:
| Dimension | Why it matters | What to check |
|---|---|---|
| Edge quality on hair/fur | The classic failure point | Zoom to 200% on a hairline; look for halos and gaps |
| Translucent objects | Glass, sheer fabric get over-removed | Test on a glass or a sheer item |
| Background similarity | Subject on a similar-color bg | The model can merge subject and background |
| Output format | PNG for transparency, or with a new bg | Confirm it exports transparent PNG, not just flattened |
| Batch / API | Catalogs of hundreds | Does the free tier cap batch size? |
| Resolution cap | HD output | Free tiers often limit output resolution |
How do you judge a good cutout?
The single most useful test: zoom into the edges at 200% and look at three things.
- Halos: a faint fringe of the old background color around the subject. Caused by the model including edge pixels that were color-contaminated by the background.
- Gaps: missing chunks of the subject, usually where subject and background colors were too close. Common on blonde hair against a light wall.
- Hard vs. soft edges: hair and fur should have soft, semi-transparent edges; a hard object edge should be crisp. A tool that makes everything hard looks cut out; one that makes everything soft looks blurry.
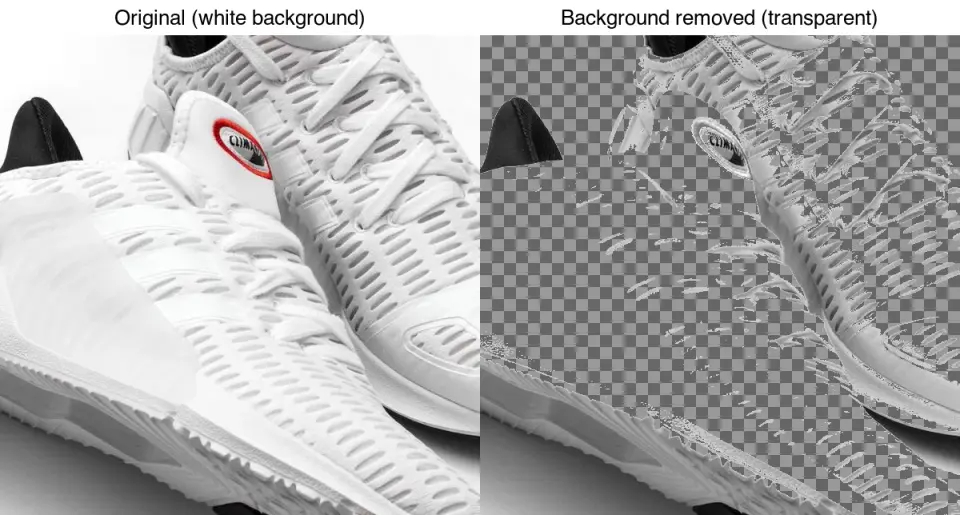
The before/after above is a clean case — a solid product on a plain white background, where fuzz-threshold or model-based removal both work well. Hair and translucent objects are where the tools separate.
What can you do with a removed background?
Once the background is transparent, the same cutout drops onto any backdrop — which is why one clean product photo becomes a whole set of assets:
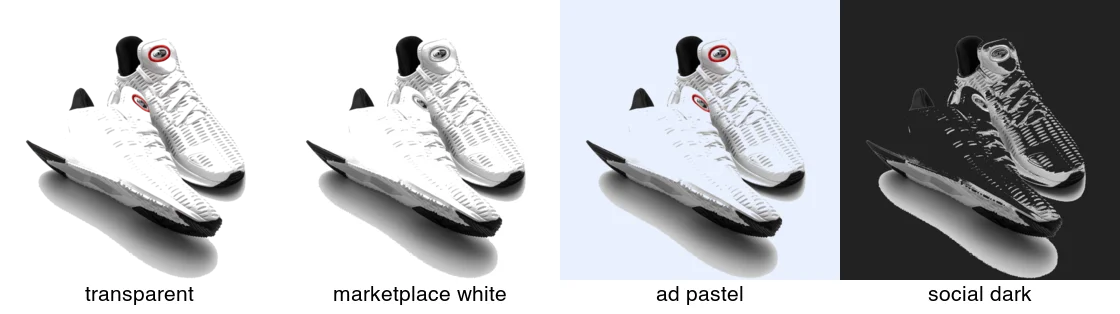
Typical uses:
- Marketplace main image: drop on pure white, centered, to meet Amazon/eBay requirements.
- Ad creatives: place on brand colors or lifestyle scenes.
- Social posts: dark or pastel backdrops for consistency across a feed.
- Design assets: transparent PNG for layout compositing.
- Passport/ID photos: replace with the required solid color (see the ID photo background guide).
This reuse is covered in more detail in the background removal use cases guide.
How do the free tools compare on verifiable features?
Quality varies by image, so this table covers only checkable features. Confirm current limits on each tool's pricing page before building a pipeline around them.
| Tool | Signup | Batch (free) | Transparent output | Runs where |
|---|---|---|---|---|
| Imagic AI | No | Yes, through Batch Processor | PNG | Server |
| remove.bg | Check current flow | Check current plan | PNG | Cloud service |
| Adobe Express | Check current flow | Check current plan | PNG | Cloud service |
| Photoroom | Check current flow | Check current plan | PNG | App and cloud service |
rembg (CLI) |
No | Unlimited | PNG | Local |
Online tools are convenient for a handful of images; rembg is the better fit when you have hundreds or require local processing with no image upload. Imagic AI uploads files to its server, and production configuration may return a result from a public CDN, so do not use it for confidential images. Pair the cutout with the image resizer and image converter to produce final channel-ready files.
When should you mask manually?
Automated removal is good enough for most product photos and social assets. Mask manually (Photoshop, GIMP, or Affinity) when:
- The subject has fine, semi-transparent detail (hair, smoke, glass) that a model fringes or gaps.
- The result is going to print at large size, where edge artifacts are visible.
- The subject and background colors are so close that the model merges them.
Manual masking is slow per image, so reserve it for hero shots, not catalog volume. For catalog volume, automate with rembg and manually fix only the rejects.
Common mistakes
- Accepting the first result without zooming. Always check edges at 200% before exporting.
- Keeping a halo. A faint background fringe is fixable with a 1–2px defringe/shrink of the mask.
- Over-compressing the transparent PNG. PNG is lossless; re-encoding as JPEG destroys transparency. Export to WebP if you need smaller transparent files.
- Ignoring color bleed. Edges lit by a colored background pick up that color; the cutout looks off on a new backdrop. A slight color correction on the edge fixes it.
Frequently asked questions
What is the most accurate background remover?
No tool is most accurate across all images. Edge quality is decided by the segmentation model and how hard your source edge is, and most free tools wrap the same open models. Test candidates on one easy, one medium, and one hard photo from your own set, and judge the hard one.
Which background remover should I use?
The one that fits the job. For clean product shots, most dedicated tools (Remove.bg, our Background Remover) produce comparable results. For difficult edges (hair, fur), manual refinement matters more than which automatic tool you start with. Specialization and free-use limits are the real differentiators.
What actually differs between background removers?
Provider documentation can establish signup rules, batch support, formats, processing location, and plan limits, but only a controlled test on the same images can establish edge quality.
How do you judge a good cutout?
By the edges at 100 percent zoom: sharp, smooth, no halo, no color bleed from the original background. A cutout that looks fine at thumbnail size often shows rough edges up close. Always inspect the hardest edge (hair, fur) before accepting a cutout.
When should I mask manually?
When the automatic pass leaves halos, hard cutoffs, or color bleed — usually on hair, fur, glass, and transparent objects. Automatic removal handles the bulk; manual masking fixes the last few percent of edge quality that automation cannot.
Do background removers work on video?
Some do, frame by frame, but video background removal is far harder than a single image because the cutout must stay consistent across frames. Expect flickering edges without temporal processing. It is a different, harder problem than photo removal.
What is the difference between a free and a paid background remover?
Paid plans commonly add volume, API access, batch workflows, higher-resolution exports, or refinement controls; compare the provider's current plan page because these limits change.
Do background removers preserve hair detail?
Partially. Most tools get the bulk of hair but leave a halo or hard cutoff at the finest strands, because hair is exactly the soft, semi-transparent edge that segmentation models handle worst. The reliable fix is a manual mask pass on the hair region after the automatic removal — soften the edge, recover individual strands, and decontaminate stray color from the original background. Expect to do this on any portrait.
Can background removal handle fur and hair?
Partially. Tools get the bulk of a furry subject but soften or halo the finest strands, because fur is exactly the soft, semi-transparent edge segmentation models handle worst. For a clean result, run the automatic pass, then refine the edge manually — soften the mask, recover strands, and remove color bleed from the original background. Expect manual work on any furry or hairy subject.
Image credits
- Before/after removal and cutout use cases — generated by the author from a sneaker product photograph (Pexels #1461048, photo by Ray Piedra) using a fuzz-threshold background removal to show a real transparent cutout.
- Hair-edge halo comparison — generated by the author by running a portrait (Pexels #5500530, photo by Andy Barbour) through the
isnet-general-usemodel in rembg, the same model this site's background remover uses, and compositing the result on mid-grey.
Use the free tools while you follow the guide.
Keep reading
2026-08-09
Batch Background Remover Comparison 2026: E-commerce
PhotoRoom, remove.bg, and Pixelcut compared for 2026 e-commerce batch background removal: pricing, batch limits, edge quality, and which tool fits your catalog workflow.
2026-08-02
Batch Background Removal: Process Hundreds of Images at Once
Batch background removal by tool and cost: rembg CLI for free local bulk processing, remove.bg and Photoroom APIs for catalogs, and which fits a product photo workflow.
2026-07-26
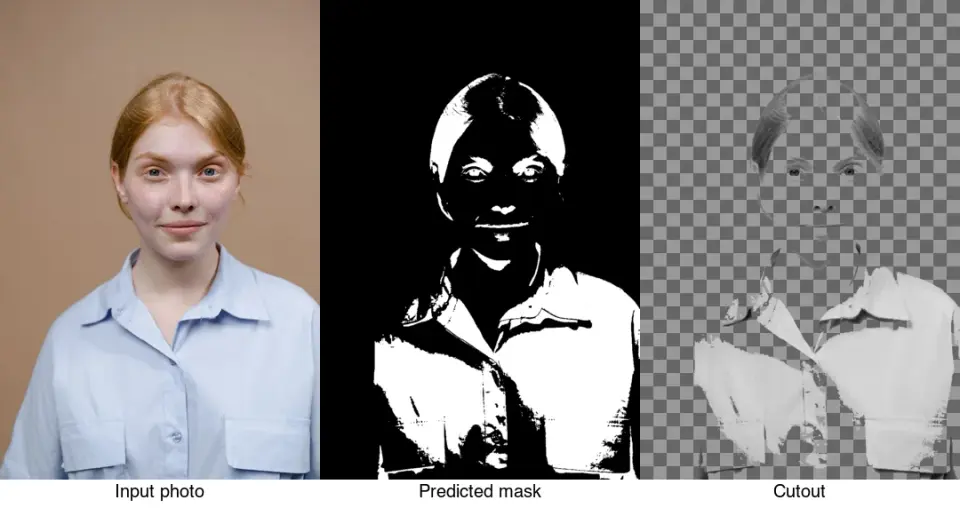
AI Background Removal: How U2-Net Segments Subjects
How AI background removal works: the U2-Net model, how it predicts a foreground mask, where it succeeds and fails on hair and edges, and how to use and fix its output.